How to Install and Configure SVN Server on CentOS Linux Systems

Subversion (SVN) is an open source version control system. It helps you keep track of a collection of files and folders. Any time you change, add or delete a file or folder that you manage with Subversion, you commit these changes to your Subversion repository, which creates a new revision in your repository reflecting these changes. You can always go back, look at and get the contents of previous revisions.
This article will help you for step by step setup of subversion (svn) server on CentOS, Red Hat & Fedora systems.
1. Install Apache
Firsty You need to install Apache web server to access svn server using http urls. Skip this step if you already have Apache web server on your system.
# yum install httpd
Start Apache web server and setup to auto start on system boot
# service httpd restart
# chkconfig httpd on
2. Install Subversion
Use following command to install subversion packages and there dependencies. Also install svn module for Apache mod_dav_svn packages on your system..
# yum install subversion mod_dav_svn
3. Configure Subversion with Apache
Subversion module package creates an Apache configuration file, we just need to make necessary changes to it.
# vim /etc/httpd/conf.d/subversion.conf
LoadModule dav_svn_module     modules/mod_dav_svn.so
LoadModule authz_svn_module   modules/mod_authz_svn.so

Alias /svn /var/svn

<Location /svn>
   DAV svn
   SVNParentPath /var/svn
   AuthType Basic
   AuthName "Subversion User Authentication "
   AuthUserFile /etc/svn-users
   Require valid-user
</Location>
4. Create First SVN Repository
Use following command to create your fist svn repository.
# cd /var/svn
# svnadmin create myrepo
# chown -R apache.apache myrepo
5. Create SVN Users
Now add svn users in /etc/svn-users file. These users will use for authentication of svn repositories for checkout, commit processes. Following commands will add two users in /etc/svn-users file. I have created file using touch command. This can be also create with -c switch in htpasswd command but remember that -c switch delete existing file and create a new file, So to avoid accidental removal of existing file we recommend to use touch command.
# touch /etc/svn-users
# htpasswd -m /etc/svn-users user1
# htpasswd -m /etc/svn-users user2
6. Access Repository in Browser
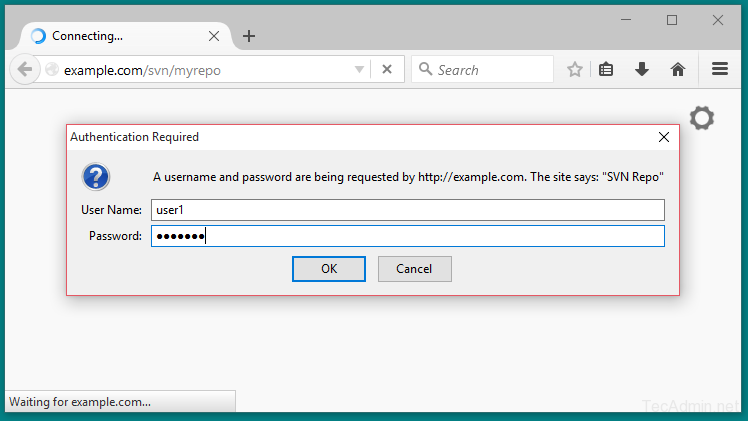
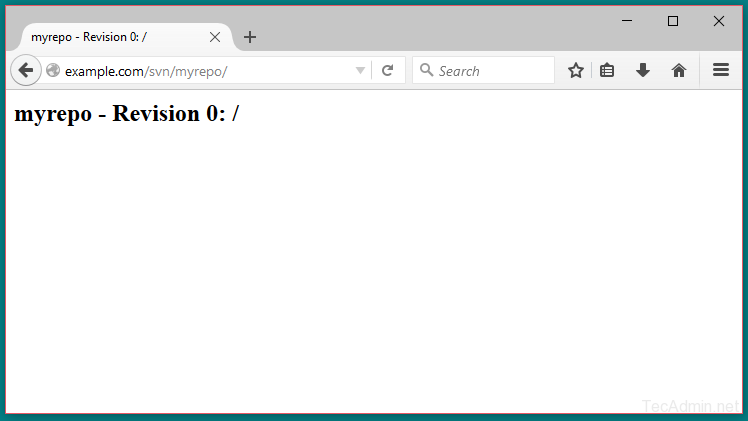
Use http urls to access your repository in browser. It will prompt for authentication. Use login credentials created in Step 5. Change example.com with your system host name, domain name or ip address.
http://example.com/svn/myrepo/
7. Basic Operations on Repository
This step is for testing that repository is working properly. Use following commands to add few files to your svn repository.
- Checkout repository on your local system. It will create the folder on local system with the repository name.
# svn co http://example.com/svn/myrepo/
- Add some files to checkout repository directory.
# cd myrepo
# touch file1.txt index.php
- Now add newly created files to svn repository and commit them to svn server repository.
# svn add file1.txt index.php
# svn ci file1.txt index.php -m "initial commit"
Let’s check back to http://example.com/svn/myrepo/ url in browser. You will see your new files there.
Thank You for using this article. Read our next article How to Backup and Restore SVN Repository in Linux.

If You Appreciate What We Do Here On Mimastech, You Should Consider:
- Stay Connected to: Facebook | Twitter | Google+
- Support us via PayPal Donation
- Subscribe to our email newsletters.
- Tell other sysadmins / friends about Us - Share and Like our posts and services
We are thankful for your never ending support.


